
Replace the ink cartridges
NOTE: For information on recycling used ink supplies, see HP inkjet supplies recycling program
on page 121.
If you do not already have replacement ink cartridges for the printer, see Order printing supplies
online on page 137.
NOTE: At this time, some portions of the HP website are available in English only.
NOTE: Not all cartridges are available in all countries/regions.
CAUTION: While ink cartridges are not damaged when left outside of the printer, the printhead does
need to have all cartridges installed at all times after the printer is set up and in use. Leaving one or
more cartridge slots empty for an extended period may lead to print quality problems and possibly
damage the printhead. If you have recently left a cartridge out of the printer for an extended period, or
if you have had a recent paper jam, and have noticed poor print quality, clean the printhead. For more
information, see Clean the printhead on page 86.
To replace the ink cartridges
Use these steps to replace the ink cartridges.
1.
Make sure the printer is turned on.
2.
Open the ink cartridge access door.
WARNING! Wait until the print carriage stops moving before proceeding.
3.
Press the front of the ink cartridge to release it, and then remove it from the slot.
4.
Remove the new ink cartridge from its packaging.
ENWW
Replace the ink cartridges 45
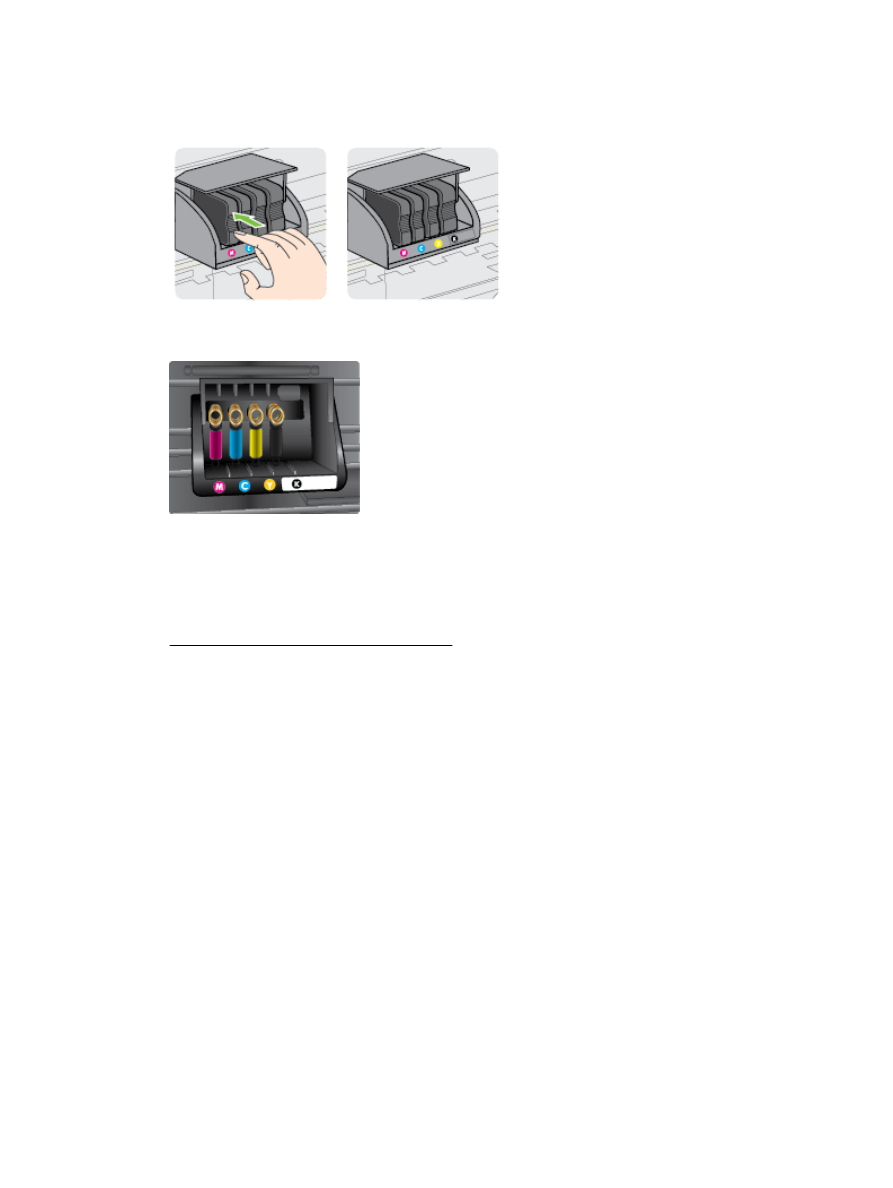
5.
Using the color-coded letters for help, slide the ink cartridge into the empty slot until it is securely
installed in the slot.
Make sure that you insert the ink cartridge into the slot that has the same colored letter as the
color you are installing.
6.
Repeat steps 3 through 5 for each ink cartridge you are replacing.
7.
Close the ink cartridge access door.
Related topics
●
Order printing supplies online on page 137
46 Chapter 4 Work with ink cartridges
ENWW